Web fonts are fonts that have been saved in a format that works on the web. They are accessed from a server via the @font-face declaration. They are accessed two ways: self serve or using a provider.
Self Serve Web Fonts
Using the @font-face declaration, you can save web fonts on your server (or your client’s server) and serve the web fonts directly to your web site. That’s what you’ll do in this exercise.
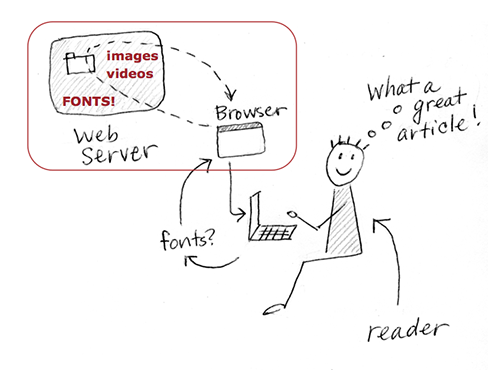
With the @font-face declaration, you can use fonts hosted on a server.
Overview of the Assignment
In this lesson, you will choose and use a display font for the h1 in your bibliography from the last exercise.
- Make a copy of the bibliography folder from the last exercise. Rename it bibliography_display. Rename your CSS file bibliography_display.css, and link to it.
- Go to fontsquirrel.com and choose a display font. Many kinds of display fonts are available; choose one that works with your text type (Georgia or Verdana).
- Download the @font-face syntax, and insert it into your new CSS document for the <h1> tag. (I explain how to do this in the lesson.)
- Adjust the size, weight, and case of <h1> and <h2> as needed, so the headings and text work together in a system.
- Write about what you see. What display font did you choose for the word Bibliography? Why? Does the font work best with Verdana or Georgia? Why? Use words such as concord (similarity), contrast, structure (x-height, bowl shape), stroke (monoline, thick/thin), style (script, retro, distressed, hand-drawn), and serif.
Getting Started
Make a Copy of Your Last Lesson Folder
In this exercise, you modify the final bibliography from the last exercise, so make a copy of the bibliography folder, and name the new folder bibliography_display. Keep the new folder inside your web_typography folder.
Set Up Your Files
Rename the CSS file bibliography_display.css. Link it to the index.html file by going into the HTML file and changing the syntax in the head element to the following:
<link href="bibliography_display.css" rel="stylesheet" type="text/css">
Change the title to
<title>Bibliography with Display Font</title>
Understanding @font-face
Most browsers recognize the @font-face property in CSS. This property lets web designers use more than just web-safe fonts. The @font-face property links to fonts, retrieves them from a web server, and displays them on a website.
Legal Issue: Linking Is Not Embedding
The ability to link fonts with the @font-face property has been around for a while, but not every browser supported it. Now that most browsers support it, one problem is that not every font’s EULA (End User License Agreement) allows it.When you’re purchasing or downloading a font to use on your website, read the EULA or other license that accompanies the font. If the license doesn’t explicitly allow web linking (or if a license isn’t provided), don’t do it. Contact the foundry or designer to negotiate or clarify permission.
Web linking is not the same as web embedding. Web embedding means that the font has been embedded in a file (text in an image, a font used in Adobe Flash). Web linking means that the font is downloaded to the browser and used to render the text on the web page. Fonts that allow web embedding don’t automatically allow web linking.
For this lesson, you obtain your fonts from fontsquirrel.com. At this writing, the site provides free fonts and states whether the fonts give permission to web-link (most of them do). Thus, you may legally use almost all the fonts on the site. Each font has a EULA; it’s your responsibility to read the license and respect its provisions.
Technical Issue: Different Browsers No Longer Use Different File Types
If you want the @font-face property to work across all browsers, you need to have access to WOFF files.As of 2016, you only need to provide Web Open Font Format (WOFF) files. WOFF is the standard of web fonts for Firefox 3.6+, Internet Explorer 9+, and Chrome 5+, and Apple iOS 4.1+ on iphones and iPads.
I don’t cover how to save WOFF files. That’s not the objective of this lesson. Instead, I show you how to use @font-face kits provided by Font Squirrel. These kits provide the files listed above, plus demo.html and stylesheet.css files so you can get going fast.
Choose A Font
For this lesson, you need to choose a display font.Find one at fontsquirrel.com that you think will work.
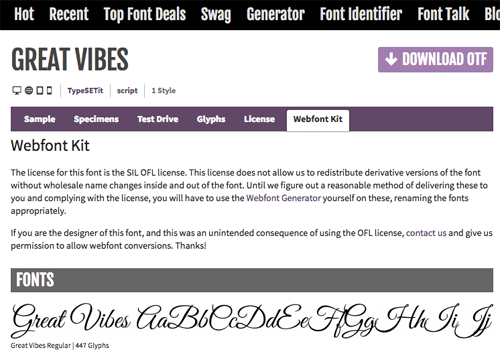
View and test-drive the font by typing in the word Bibliography. Some fonts look great until you string letters together to form words. If a font doesn’t look right to you, don’t settle. Keep looking. When you’ve found the font you want to use, click the Webfont Kit link.
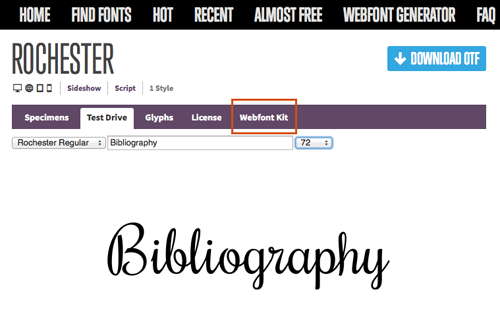
Test-drive a font before you download it. Some fonts look great until you string letters together. After you’ve picked your font, click the Webfont Kit link to start building and downloading the kit.
Download the Webfont Kit
Some EULAs permit people to modify and distribute copies of the font. For these fonts, Font Squirrel takes you directly to a page where you can download the webkit.If you do not get a page that looks like the one below skip to the section “Create Your Own Webfont Kit” below.
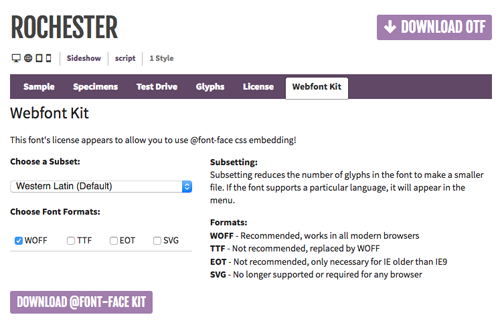
Some EULAs permit distribution. For these fonts, Fontsquirrel takes you directly to a page where you can download their webfont kit.
If You Can Download the Font’s Webfont Kit
- Choose the woff font format.
- Click the Download @font-face Kit button.
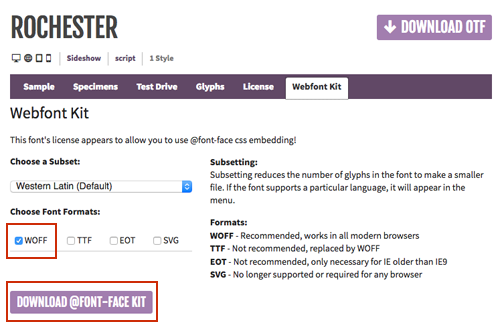
Choose the WOFF font formats and download the @font-face kit.
Check the Downloaded Files
Font Squirrel will download the webfont kit to your computer.Before using the fonts in your design, make sure everything downloaded correctly.
- Find the kit on your desktop or in your Downloads folder.
- Inside the fontface kit, find the html file with the word demo in the name. You might need to explore folders within the kit to find it.
- Open the html file in your browser to make sure that the chosen font is used in the demo — this means all the files downloaded correctly.
- You are now ready to use the font. Skip to “Use Your Web Font” below.
Create Your Own Webfont Kit
Some EULAs don’t permit people to modify and distribute the font.For these fonts, Font Squirrel will take you to a page saying you need to create your own webfont kit.
Some EULAs do not permit distribution of modified files. For these fonts, Font Squirrel links you to a page where you can download the OTF (Open Type Format). Sometimes, the link takes you off site.
If You Need to Create Your Own Webfont Kit
There are a few more steps involved.- Click “Download OTF”. Font Squirrel will download a folder to your computer.
- Find the folder on your desktop or in your Downloads folder, and unarchive / unzip it if necessary.

Download the OTF and unarchive / unzip / expand the file that fontsquirrel downloads to your computer.
- Back at fontsquirrel.com, click on the Generator link.
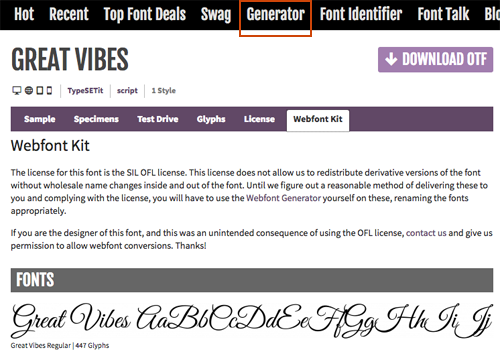
Click the Generator link.
- Click the “Upload Fonts” button, and navigate to the OTF font you just downloaded and expanded.
- Choose “Optimal” (recommended settings).
- Confirm that you are only uploading fonts legally eligible for web linking.
- Click “Download Your Kit.”
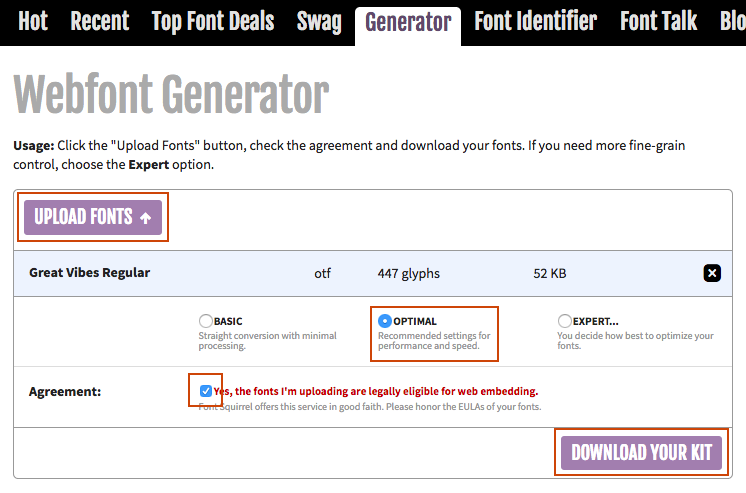
Upload the OTF, choose Optimal, confirm the font you’re using is legally eligible, and download your kit.
Check the Downloaded Files
Font Squirrel will download the webfont kit to your computer.Before you use the fonts in your own design, make sure everything downloaded correctly.
- Find the kit on your desktop or in your Downloads folder.
- Inside the fontface kit, find the html file with the word demo in the name. You might need to explore folders within the kit to find it.
- Open the html file in your browser to make sure that your chosen font shows up in the demo page — this means all files downloaded correctly.
Use Your Web Font
Put the Fontface/Webfont Kit in Your Project Folder
I recommend putting the entire fontface kit in your project folder. It’s a good idea to keep the license agreement for the font. (Read it, too!) There’s also a stylesheet.css file in there you’ll need.
Move the WOFF file(s) into the Folder with Your CSS File
Move the WOFF files (some fonts may have both a .woff and a .woff2 file) out of the fontface/webfont kit folder, so they are in the exact same folder as your CSS file.
Describe @font-face in Your CSS Document
- Find the stylesheet.css file provided by Font Squirrel in the fontface kit.
- Open the file in your text editor.
- Find and copy the following syntax from the stylesheet.css:
@font-face {
font-family: 'great_vibesregular';
src: url('greatvibes-regular-webfont.woff2')
          format('woff2'),
     url('greatvibes-regular-webfont.woff')
          format('woff'),
font-weight: normal;
font-style: normal;
}
- Open your CSS file for this lesson (bibliography_script.css), and
- paste the syntax at the top of the file.
Whoa! What does that all mean?
If you're interested in understanding the @font-face syntax, or if your syntax looks different/longer than the one I've shown, read on.The syntax below defines @font-face, and says, “I’m naming this font ‘great_vibesregular’ so I can use it for an element (such as h1).”
@font-face {
font-family: 'great_vibesregular';
Some of fontsquirrel’s CSS is still using the old @font-face syntax. If you see the lines below, they tell IE9-compatible browsers where to find the .eot file, and then IE6–IE8 browsers where to find the .eot file. You can delete these lines if you want to.
src: url('greatvibes-regular-webfont.eot');
src: url('greatvibes-regular-webfont.eot?#iefix')
          format('embedded-opentype'),
The lines below tell Firefox 3.6+ and Chrome 5+ browsers where to find the .woff file. Then they tell Firefox 3.5+, Opera 10+, Safari 3.1+, and Chrome 4.0.249.4+ where to find the .ttf file. Then they tell iPads, iPhones, Firefox 3.5+, Chrome 0.3+, and Opera 9+ where to find the .svg file.
Again, the TTF and SVG are no longer necessary. You can delete those if you want to. Always keep the lines related to WOFF and WOFF2 (both the url and the format).
     url('greatvibes-regular-webfont.woff')
          format('woff'),
     url('greatvibes-regular-webfont.ttf')
          format('truetype'),
     url('greatvibes-regular-webfont.svg#great_vibesregular')
          format('svg');
The lines below tell the browser that the font has normal weight and style. (Note: Font Squirrel will set font-weight and font-style to “normal” even if the font itself is bold or italic. Font-Squirrel does this to increase support in browsers that ignore font-weight and font-style. This method works, because if you use a bold font, its “normal” weight is bold, and if you use an italic font, its “normal” style is italic. This method can cause problems, however. You can read about the problems and how to avoid them in this article I wrote about @font-face for Smashing Magazine.
font-weight: normal;
font-style: normal;
Finally, this line closes the @font-face definition.
}
To learn more about the @font-face syntax and why it must be written in the order shown, I highly recommend the article “The New Bulletproof @font-face Syntax” by Ethan Marcotte. It’s old, but provides a glimpse into all the research that has gone into getting webfonts to work.
In the syntax, I used the font Great Vibes. Use your own font information wherever I use Great Vibes-specific information.
You can type this syntax if you prefer, but because it’s available in the stylesheet.css provided by Font Squirrel, I recommend copying and pasting it. The code contains a lot of details, and one missing piece of punctuation will prevent @font-face from working.
Use the font-family name in your h1 element
Change your h1 font-family syntax to include the new font.My h1 font-family was Georgia for the last bibliography (in Chapter 3), as follows:
h1{
     font-family:georgia;
     }
Now I add Great Vibes (changes in bold) to my font-family options (new syntax in bold):
h1{
     font-family:'great_vibesregular', georgia;
     }
View Your Web Page
After you save the document and refresh it in your browser, your display font should load. If it doesn’t load, check out the FAQs page.
Build a Font Stack
I just added Great Vibes but kept Georgia as an alternative, separating the fonts with a comma.This arrangement is called a font stack. A font stack tells the browser, “If for any reason you can’t use the first font, use the second one.” The second font is often called a fallback font.
It’s a good idea to build font stacks. This practice keeps your websites from defaulting to Times New Roman or Arial. I also recommend deliberately removing your first choice from the stack during the design process just to see what the page would look like with the second font. Try to avoid unpleasant surprises.
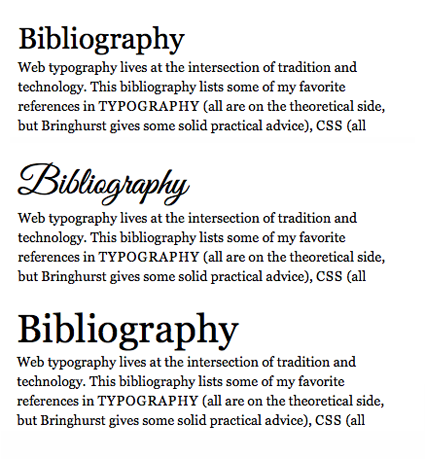
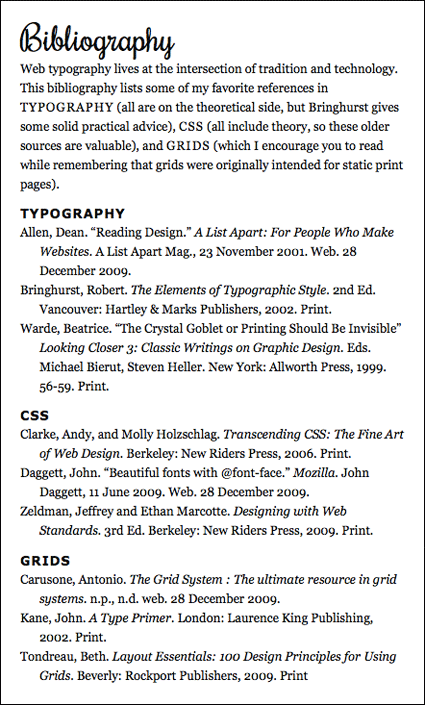
Top: The original h1, Georgia 30/40px. The main heading stands out but isn’t overwhelming. Middle: The h1 in Great Vibes 40/48px. Bottom: Georgia 40/48px. If a browser can’t use Great Vibes, it will use Georgia. The font will change, but not the size. The main heading is huge—not great, but acceptable. Keep an eye on font stacks when you’re setting text type!
Use Comments to Provide Copyright Information in the CSS File
CSS allows you to write comments in the syntax.Comments show up in the CSS file but don’t affect the HTML file.
Comments start with these characters:
/*
and end with these characters:
*/
In your CSS file, use a comment to identify any fonts linked in your file. Most EULAs require you to provide the copyright information. It’s especially important to give recognition to designers who provide their fonts free for web linking.
Providing copyright information also helps web typographers identify and find good fonts! You’ll appreciate it when others do this in their CSS.
The following syntax is modified only slightly from Font Squirrel’s copyright comment for the web font I used. Again, read the EULA to see what you’re expected to include for the fonts you use.
/*
Copyright (c) 2012, TypeSETit, LLC (typesetit@att.net), with Reserved
Font Name "Great Vibes"
This Font Software is licensed under the SIL Open Font License, Version 1.1.
This license is available with a FAQ at: http://scripts.sil.org/OFL
*/
Finishing Up
Make Changes as Needed
- Does the styling on your h1 still work with the new font? Is it too small or too big now?
- Do you need to remove a bold or italic that was originally applied?
- Do your h2 and p work with the new font? If you picked a web font that doesn’t work with your text type, be willing to change the text to the other required font (Verdana or Georgia).
- You can also use your h2 to help weave together the contrasting forms of the h1 and the p.
Jamie Thomas used Rochester (a script font) for the main headline. He changed his secondary headings (h2) to Verdana bold in order to weave a better visual relationship between the heavy script and the lighter Georgia text.
Validate Your Files
Once you have your h1 working with a display font, validate your files. Use validator.w3.org for your HTML, and jigsaw.w3.org/css-validator for your CSS.
Quick Tips
Web fonts…
- Are accessed with the @font-face declaration.
- Can live on your server with your web site.
CSS Resources
- Problems? Check out my Frequently Asked Questions page.
- Need syntax for a property I haven’t covered? Try HTML Dog.
- Want a CSS cheat sheet (2017) at your side? Just download and print!
- Using multiple weights and styles with the @font-face declaration? Check out “Setting Weights and Styles with the @font-face Declaration” by Laura Franz.
Project Resources
- Make a copy of your bibliography folder from the last lesson to do this lesson.