Connotation: An idea or feeling that a word invokes in addition to its literal or primary meaning.
In this lesson, you will write your first HTML and CSS files, including: head, title, body, h1, h2, h3, h4, div.
You will also practice using font, size, case, style, space, and opacity to communicate the emotional associations of words. If necessary, refer to the typography lesson on aesthetics and emotion.
Overview of The Assignment
- Choose a word most people have an emotional or physical association with. Words with strong associations often work best: love, hate, fear, happiness, pain, no…
- Using only web safe fonts, communicate four different (even opposite) connotations for the word.
- Experiment with case (capital and lowercase), style (roman and italic), weight (normal and bold), space (tight and loose), opacity (light and dark), and size (big and small).
- Create an HTML document defining four versions of the word and a CSS document describing how each of the four versions should look. Step-by-step instructions are given below to start a version of this lesson.
- Ask at least two people to look at your finished work and describe the emotional associations they have with each version of the word. Do they see what you intended to show? “Testing” your work will help you think about your readers while learning to communicate emotional associations in a subtle way with available resources (web-safe fonts).
- Write about your decisions. How did you use size, case, style, opacity, and font to affect the meaning of the word? Did other people have the same emotional associations with the word that you did?
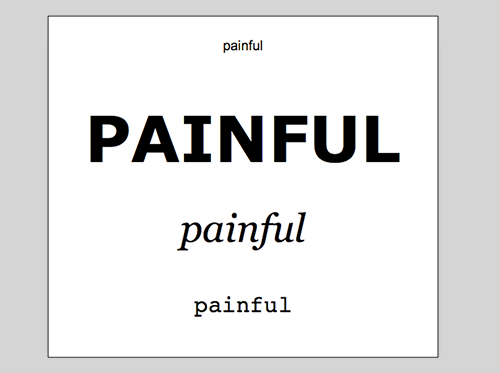
Using only web safe fonts, Josh Terciera worked with the word “painful.” Top to bottom: a small pain, something very painful, pleasantly painful, writing code can be painful.
Before You Write the HTML and CSS Files
Before you can start, you need to get a text editor (so you can write the files), learn about naming conventions (so the files work), and set up folders (to put the files in).
Get a Text Editor
You need a text editor to write your files.I used Brackets from Adobe for my files. The software is free, and works on both Macs and PCs. There are lots of videos and tutorials out there on how to use the software. There are some bells and whistles, but it’s pretty easy.
If you’re interested in using something with less bells and whistles, I recommend TextWrangler from Bare Bones Software for the mac, and Notepad++ for the PC. Both are free text editors.
If you’re working in a program such as Adobe Dreamweaver, you can still do all the lessons. But make sure you work in code view!
Naming Your Folders and Files
Follow some basic naming rules...- Filenames need to be consistent, and HTML is case sensitive. I always use lowercase letters (no caps), so I know exactly what case I used for each filename.
- Your home page must always be called index.html. A browser will look for and open the index.html file in any folder you send it to.
- HTML does not like spaces. If you create a file, folder, or image name with a space in it, any links to that file, folder, or image will break. Use a hyphen (-) or underscore character (_) instead of a space. For example, I would name a folder word_connotations instead of Word Connotations.
- To keep filenames simple and links working, use only letters, numbers, and hyphens or underscore characters.
- Periods (dots) should only be used with file extensions (.html, .css, and so on)
- Finally, name your files and folders something meaningful. You won’t remember what the heck new_page2.html is tomorrow morning.
Create Folders to Organize Your Files
HTML files link to images, other HTML documents, PDFs, CSS files, and so on. These links only work if the HTML file knows where to find the other files.For now, you’ll be working in a kind of closed system. Your HTML files will reference only other files on your desktop. It’s still important to keep everything organized so that links don’t get broken.
- Create a main folder on your desktop for all the lessons you’ll do for TWD, calling it web_typography_yourlastname.
- In that folder, create a folder for this lesson, and call it word_connotations.
Start the HTML File
In your text editor, create a new document, and save it as index.html in your word_connotations folder.
In the index.html file, type the initial code
<!DOCTYPE html>
<html>

<head>
<title>Title of the document</title>
<meta charset="UTF-8">
</head>

<body>
</body>

</html>
OK, so what the heck does all that mean?
The DOCTYPE
Take a closer look at the first line:<!DOCTYPE html> <html> <head> <title>Title of the document</title> <meta charset="UTF-8"> </head> <body> </body> </html>
The DOCTYPE tells browsers that your file is written in HTML. This simple DOCTYPE (older versions were much more complex) tells browsers to render the document using current standards. The DOCTYPE is case sensitive. Type it exactly as shown. If there is no DOCTYPE, or if there is an unrecognized one, a browser will assume you’ve written invalid mark-up. The browser will use “quirks” mode and interpret the document as best it can, often rendering the page incorrectly.
Tags
HTML uses tags to define elements.Most tags come in pairs: they open and close. Look at the HTML you’ve written. Find the <html> tag and the </html> tag. The first tag opens the definition; the second tag (with the /) closes the definition. The <html></html> pair means that everything between these two tags is HTML.
Head, Title, and Body Elements
Your HTML has three other tag pairs:<head></head> <title></title> <body></body>
The closing tag in each pair includes a slash (/).
An HTML document begins with a head element, which defines information about the document (what the title is, the link to the CSS file, metadata, scripts, and so on).
Next is the title element, which lives in the head element. The tag pair <title></title> should be nested inside the <head></head> tags. In other words, the <title></title> tags always go after the starting <head> tag but before the closing </head> tag, as follows:
<!DOCTYPE html>
<html>

<head>
<title>Title of the document</title>
<meta charset="UTF-8">
</head>

<body>
</body>

</html>
There is also some metadata in the head element (right after the title element):
<!DOCTYPE html>
<html>

<head>
<title>Title of the document</title>
<meta charset="UTF-8">
</head>

<body>
</body>

</html>
This metadata defines the character encoding, which tells the browser what set of characters (letters, numbers, and so on) to use when converting the bits to characters. You don’t need to understand exactly how it works; just know that this line is required and should live in the head element.
Notice that, unlike the title element (which wraps around the text to use as the title of the web page) the meta element is an “empty” element — it doesn’t wrap around anything. It doesn’t come as a pair of tags. Sometimes, you’ll see an extra forward slash added to the end of an element that doesn’t have a closing tag. For example, you might see:
<meta charset="UTF-8" />
These extra forward slashes are a holdover from the practice of using XHTML to write HTML documents. We used them because XHTML requires all tags to close. They are not necessary when writing HTML. If you see a webpage that uses these closing forward slashes, it may be an older page written in XHTML, or it may have been written by someone who used to use XHTML and continues to close all their tags.
Using these forward slashes are not necessarily wrong; HTML will work if you use them. But since the forward slashes aren’t necessary in HTML, you won’t be using them for the lessons in this book.
Finally, the last pair of tags is the body element, which will wrap around the content of the HTML document. You’ll add content here as you progress through the lesson.
<!DOCTYPE html>
<html>

<head>
<title>Title of the document</title>
<meta charset="UTF-8">
</head>

<body>
</body>

</html>
View Your Web Page
Do you see a blank screen, with Title of the document at the top of the browser window? Perfect!
NOTE: Some browsers do not show the title of the document at the top of the browser window. If you don’t see the title, don’t panic. Keep working.
Now you can start putting in some content.
Give the Page a Title
Back in your text editor:Between the <title> tags, change Title of the document to Word Connotations.
The title of the document is NOT the same as the name of the document (e.g., index.html). Instead, it is a meaningful title that tells readers what page they are on. The title will show up in the window tabs of some browsers such as Firefox.
Add the Content
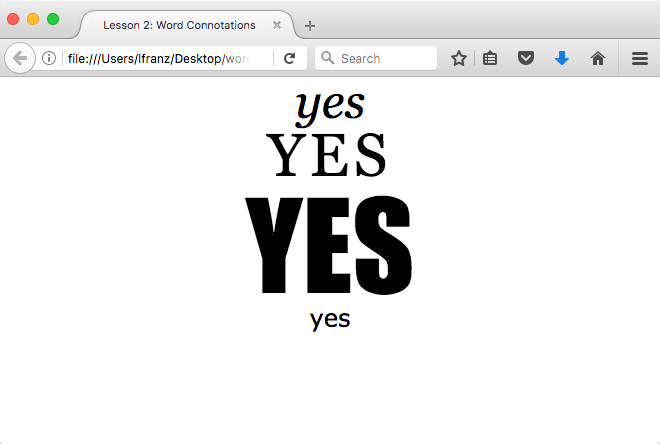
Between the <body> tags, add your word four times (see bold text in the example below). It will look something like this (I’m using the word “yes” you should use your own word):
<body>
yes
yes
yes
yes
</body>
View Your Web Page
Save your document and open it in your browser.
Note: if your browser is still open you can just click the Refresh button.
Your web page now has a meaningful title at the top of the browser window, and it has your word written four times. Unfortunately, the word runs across a single line, like this: yes yes yes yes.
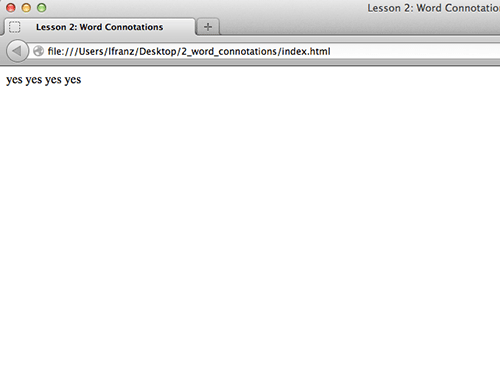
The word runs across a single line because you haven’t told the browser where to put line breaks.
Why does it look like this? Browsers translate the HTML. Your browser will only show what you’ve given it. You didn’t told the browser where to put line breaks, so it didn’t add any.
Define Your Headings
Use h1, h2, h3, and h4 tags.Officially, these four words are not headings. But you need to set each of the four words differently. So you’ll use a variety of heading elements to do so.
Add the following tag pairs (shown in bold) to your HTML, using one pair around each word:
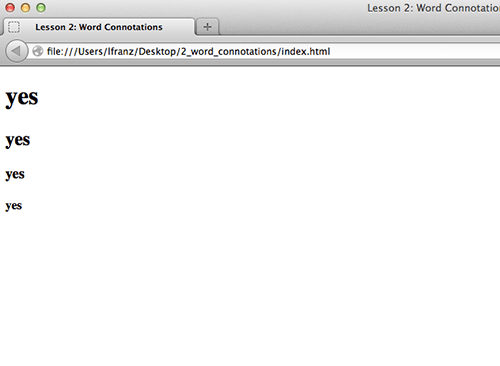
<body>
<h1>yes</h1>
<h2>yes</h2>
<h3>yes</h3>
<h4>yes</h4>
</body>
View Your Web Page
Save your HTML document, and view the changes. You should see your words in a column along the left edge. The words are bold and get smaller as they go down.
Headline elements (h1 to h6) have default property values. For example, they all default to bold. You need to describe elements differently in CSS if you don’t want items to be displayed with default settings.
Why does each word look a little different from the others? The heading elements (h1 to h6) have default stylistic values that browsers use to display the headings — unless you describe the elements differently. That’s exactly what you’re going to do next.
Start the CSS File
The CSS document is where you can, among other things, describe how HTML elements should look. In this assignment you will tell the browsers what the h1, h2, h3, and h4 elements look like.
In your text editor, create a new document and save it as word_connotations.css in your word_connotations folder.
How to Describe an Element
CSS descriptions have three parts:- Selector: The element/ID/class you want to describe
- Property: The attribute you want to affect
- Value: The value you want to assign to the property
Written together, they look like this:
selector{property:value;}
If you want to set your h1 in Georgia, for example, you would write it like this:
h1{font-family: georgia;}
To set your h1 in 24px Georgia, you write it like this:
h1{font-family:georgia;font-size:24px;}
The two properties (font-family and font-size) are separated by a semicolon. There are no spaces anywhere in the syntax. If you ever need to type a value with two or more words (such as Comic Sans MS), put that value in quotation marks (as in font-family:”Comic Sans MS”).
If you want to set your h1 in 24/32 Georgia and remove the bold (default) setting associated with the h1 element, your syntax is going to get longer. To make CSS easier to read, put one property:value pair on each line, separated with a semicolon, like this:
h1{
   font-family:georgia;
   font-weight:normal;
   font-size:24px;
   line-height:32px;
   }
It is also customary to indent the property:value pairs. This helps make the syntax easier to read.
The one place you can consistently add spaces in your CSS without causing problems is after the colon separating the property and value. Thus, your syntax will still work if it looks like this:
h1{
   font-family: georgia;
   font-weight: normal;
   font-size: 24px;
   line-height: 32px;
   }
Describe the First Element: h1
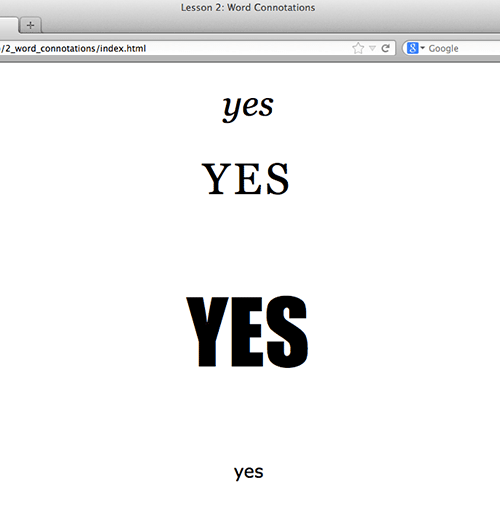
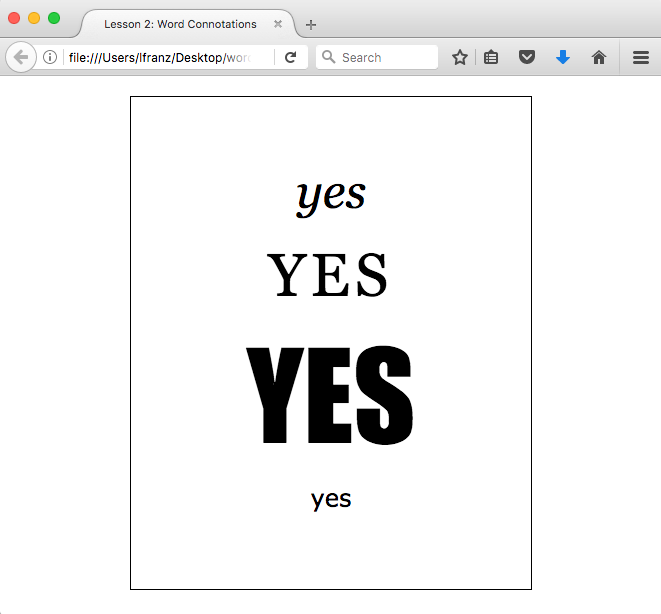
Four versions of my word, yes.
Make it 48/48 Georgia italic, regular weight, and centered.
To do this, type in the following CSS syntax and then save the CSS file:
h1{
   font-family: georgia;
   font-style: italic;
   font-weight: normal;
   font-size: 48px;
   line-height: 48px;
   text-align: center;
   }
View Your Web Page
Wait! Nothing changed! What went wrong?
If you make changes in the CSS file, but the page doesn’t change in the browser, the number one problem is the two files are not “talking to each other.”
Tell the HTML File to Reference the CSS File
The browser doesn’t know to use the CSS file until you tell it to.Add the following line in the head element (that is, between the <head></head> tags) of the HTML file:
<link href="word_connotations.css" rel="stylesheet" type="text/css">
Put this syntax in the head element of any HTML file that references a CSS file. Here you’re telling the HTML file to reference word_connotations.css, which is the CSS file you just created. This filename is a variable. The CSS file name will change for each project.
View Your Web Page
Save the HTML file, and reload the file in the browser window.
It works!
Describe the First Element (h1) Your Own Way
Back in your CSS file...change the styling of the h1 so it looks the way you want your first word to look. Change font, weight, size, case, letter-spacing, and opacity as needed.
Here’s a CSS cheat sheet (2017) to help you make your changes.
Describe the Second Element: h2
Start by identifying the element you want to style.You want to style the h2, so type in the following CSS syntax:
h2{
   }
Now list the the properties and values (between the curly brackets) as needed! Remember to separate each property:value pair with a semi colon (;)
For example, the CSS for my h2 looks like this:
h2{
   font-family: georgia;
   font-weight: normal;
   font-size: 60px;
   line-height: 60px;
   text-transform: uppercase;
   letter-spacing: 5px;
   text-align: center;
   }
View Your Web Page Often!
Save the CSS file as you work and view the web page in the browser after each small change. This will help you catch syntax errors immediately, so you can fix them more easily.
Describe the Third and Fourth Elements: h3 and h4
I’m not going to tell you how to type in the syntax.You’ll learn more quickly if you piece it together from the what you did for the h1 and h2 (and, of course, the CSS cheat sheet (2017).
Why is There So Much Space Between the Words?
Whenever you start a project, clear all margins and padding to 0. Then add space back in — only where you want it.Everything looks good, but the words have unexpected spaces between them. These spaces are caused by default margin (space) and padding (space) in the h1-h6 elements. You can control these spaces with the CSS universal selector.
The universal selector applies the same value to all specified properties in all elements in the HTML document. It’s represented by an asterisk (*).
This means you can set all margins and padding (for every single element on the page) to 0 using the universal selector! To do this, add it at the top of your CSS document, as follows:
*{
 margin: 0px;
 padding: 0px;
 }
All margins and padding for all four words (h1, h2, h3, h4) are now set to 0.
View Your Web Page
Save the HTML file, and reload the file in the browser window.
With all margins and padding set to 0.
Add Vertical Space Back In
In your CSS document add a margin-top to each of your headings, like so:(h1 changes in bold):
h1{
   font-family: georgia;
   font-style: italic;
   font-weight: normal;
   font-size: 48px;
   line-height: 48px;
   text-align: center;
   margin-top: 100px;
   }
Add as much or as little as you need for each word. The margin-tops do not have to be equal.
View Your Web Page
Save the HTML file, and reload the file in the browser window.
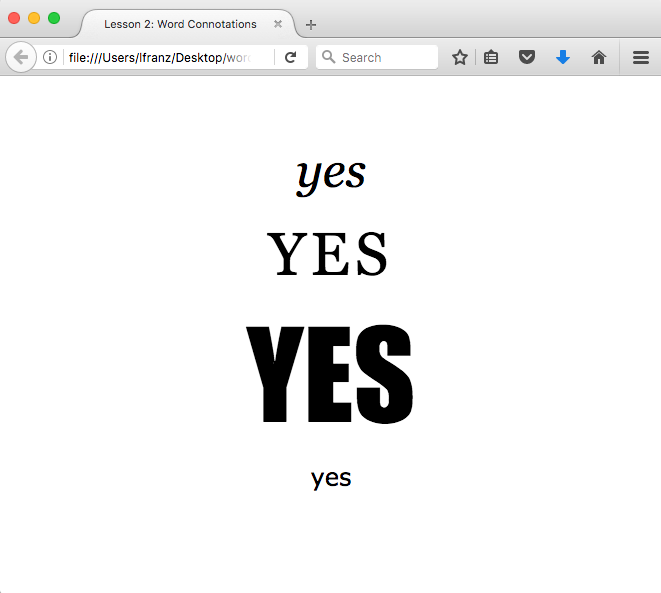
Using “margin-top” on each heading, space has been added above each word.
Create a div
Div is short for division. Think of a <div></div> pair as a container (or layout box) you can use to structure your web page.
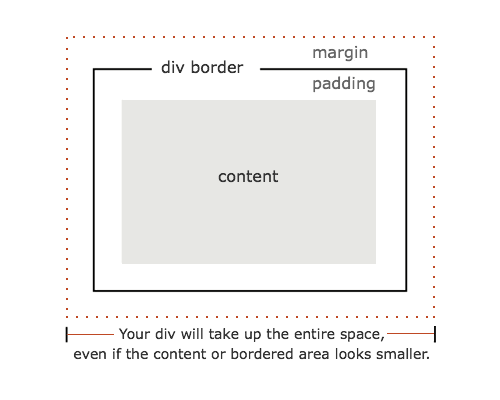
A div has margins and padding, even if readers see only the border and content.
A div is a box to hold content. It has a border. It also has padding inside the border and a margin between the border and other elements in the layout. You’ll become more acquainted with margins, padding and borders later, but for right now, add and describe a simple div.
Add a div in Your HTML
You want your four words to live inside the div, so add the <div> tags around your content.Type the following syntax inside your body element (after the body element start tag) and before your h1 element (before the h1 start tag), like so (new syntax is in bold):
<body>

<div id="main_container">
<h1>your word</h1>
As with most elements, you have to close the div. You want the div to wrap around all four words. So after your h4 element (after the h4 closes), but still inside your body element (before the body closes), type the following (new syntax is in bold):
<h4>your word</h4>
</div>

</body>
Notice you didn’t type just <div> to open the div element. Why? Web pages contain more than one div to structure the content (just as most magazine pages have more than one column of text). Unlike headlines, in which you have six (h1 to h6) tags to work with, you have only one <div> tag to use, so you need to identify (ID) which div you are using in your HTML.
I’ve named the div “main_container” because it’s the main div that contains all the other elements in the layout. In HTML and CSS, you can name divs whatever you want to. I find that main_container is most meaningful for me, but you’ll often see the main div referred to as wrapper. You can call it wrapper if you prefer. Just make sure that the div name in your HTML matches the div name in your CSS.
As your web pages become more complex, you’ll need to identify multiple divs to build your pages (div IDs are unique and can only be used once on a page). You should always name your divs in a meaningful way: text_column, image_column, and so on.
Describe the div ID
In order to see the div, you need to describe the ID in your CSS.To make your main_container div a white rectangle (400px wide) with a black border (1px), centered in the browser, write the CSS syntax (in your CSS file) like this:
#main_container{
    width: 400px;
    border-width: 1px;
    border-style: solid;
    margin-top: 20px;
    margin-right: auto;
    margin-left: auto;
    background-color: #ffffff;
    }
The ID selector looks different from the h1 selectors.
That’s because you’re not describing an element (h1, div)… you’re describing an ID that can be applied to an element. To create and describe an ID in CSS, you must precede the name with a hash mark (#). Thus the ID selector becomes #main_container.
There are also some new properties in this syntax.
You set the size of the container to 400px wide and put a solid, 1px border around it. By default, borders are black, so you didn’t have to specify the border color. You did not set a height. Why? Because the div automatically opened up to a height that holds all the content inside it.
Finally, you made the main_container background color white. CSS uses hexadecimal color codes to represent RBG (red, green, blue) colors, and #ffffff means white. Plenty of color charts are available online. My favorite is Hues Hub.
You also re-used a property.
You set the margins of the main_container. Margins are the spaces between an element and any elements next to it. The only element next to your main_container is the browser window. The margin-top put 20px between the top edge of the main_container and the browser window. Most importantly, the margin-left and margin-right told the browser to automatically calculate the amount of margin to put between the sides of the main_container and the browser window. Setting the margin-left and margin-right to auto keeps the main_container centered left to right, regardless of the width of the browser window.
View Your Web Page
Save the your files, and reload the file in the browser window. There’s a problem.
The main_container is in place, but the bottom “yes” is too close to the border.
All the margins and padding (except those you’ve changed) are set to 0 via the universal selector. There’s no extra space between the bottom border of the main_container and the bottom edge of the last bit of content (in this case, the h4) inside it.
Add Space Between the h4 and the Bottom of the Main_Container
Since you've been using margin to add space, add a margin-bottom to your h4 element.h4{
font-family: verdana;
font-size: 24px;
line-height: 24px;
font-weight: normal;
text-align: center;
margin-top:30px;
margin-bottom:80px;
}
View Your Web Page
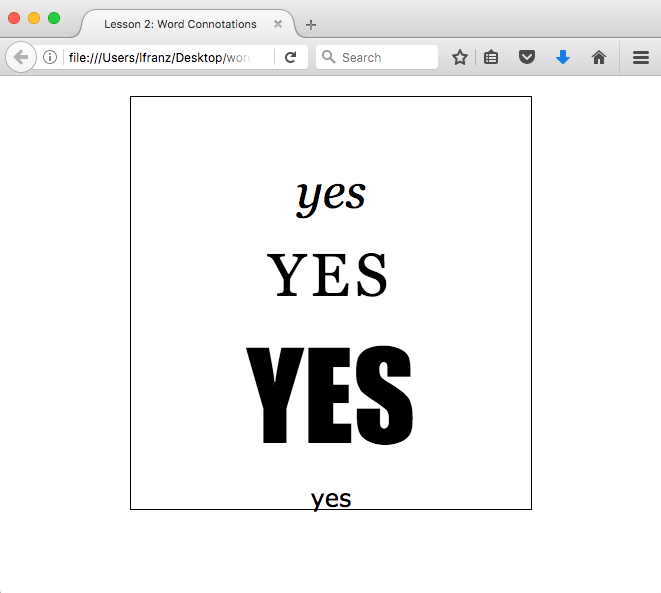
Save the CSS file, and reload the file in the browser window. It looks good.
Adding a margin-bottom to the h4 added space between the bottom of the h4 and the border of the main_container.
Add a Background Color to the Page
After you learn the syntax for a property, you can use it across selectors.background-color: #ffffff;
To add a background color to the page, use the same property syntax but apply it to the body element. In the CSS file, type the following:
body{
background-color: #999999;
}
View Your Web Page
Save the CSS file, and view the web page in the browser again. It should look similar to mine.

The background-color syntax changed the background color of the body (the whole page) to gray.
You have created and described four heading elements, described the body element, and created and described an ID for a div. Congratulations!
Validate Your Work
Before you move on to the next lesson, you want to make sure your HTML and CSS are valid (and will work properly across multiple browsers and devices). If you banged your head a few times while doing this lesson, you’ll be happy to learn that validating your pages when things aren’t working can also help you find and fix errors as you go.
Validate Your HTML
Validator.w3.org is the site for validating your HTML markup. Once there:
- Choose to validate by Direct Input (currently the third tab).
- A white text box appears.
- Open the file you want to validate in your text editor.
- Select all and copy.
- Back at the validation page, paste in your copy.
- Click “check.”
- If you get any errors or warnings, scroll down to read them.
A note on errors: the validator returns a warning stating where (on what line of syntax) the error was found. It also provides a statement describing the error. If you are not familiar with HTML lingo yet, the statement might not make sense. But you can still look at your syntax to find what is missing, or typed incorrectly, and fix it.
The validator often sees an error when a new (often correct) element starts. So the error may not actually be in the line indicated by the validator. Start at the line indicated, and if the error is not in that line, move backward through your syntax to find the error.
Validate Your CSS
jigsaw.w3.org/css-validator is the site for validating your CSS. Once there, you’ll follow the exact same steps as you did when validating your HTML above.
Again, the validator often realizes there is an error when a new (often correct) property starts. So the error may not actually be in the line indicated by the validator. Start at the line indicated, and if the error is not in that line, move backward through your syntax to find the error.
Always validate your work. Even if I don’t tell you to!
Quick Tips
- Problems? Check out my Frequently Asked Questions page.
- Need syntax for a property I haven’t covered? Try HTML Dog.
- Want a CSS cheat sheet (2017) at your side? Just download and print!